examples
Cypress testing with disposable email accounts
Test email sign-up, password verification and more with Cypress testing and MailSlurp. Capture OTP magic links and test auth flows end-to-end.
Cypress JS is a powerful open source web testing framework that allows you to write an automated test suite using real browsers. With MailSlurp you can test using real email accounts created on demand - for free.
In this example we will see how to test login and sign up using one-time disposable email addresses and a real web app.
Integration options
You can use email with Cypress in two ways: using the mailslurp-client package that gives full access to the API OR using the official MailSlurp Cypress Plugin with Cypress convenience methods. This guide covers usage of Cypress with the mailslurp-client npm package. Use the cypress-mailslurp plugin instead if you want the cy.mailslurp() extensions available in your project.
Quick links
- Code example repository
- MailSlurp client package
- Cypress Plugin tutorial guide
- Cypress Plugin example code repository
- CypressJS Plugin documentation
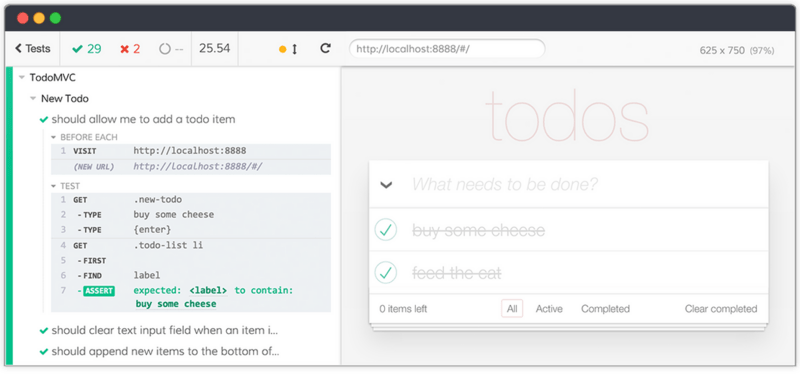
Cypress JS
Cypress is an amazing end-to-end testing framework. It's popular, bundles its own chrome browser and is easily extended.
Cypress lets you test many parts of a website or web application with a browser in an automated way. It's like Selenium but a lot more user-friendly. To get started create a new test folder and run npm init -y to create a new NodeJS project. This will create a node modules folder and package.json for further steps.
Installing Cypress
When installing Cypress simple run npm install --save cypress in the command line and then run npx cypress open to open the Cypress app. A Cypress welcome window will show that allows you to configure the browser you wish to use and scaffold a basic test file.
Testing with real email addresses
Many application use emails for account login and creation. Testing logins with Cypress is easy if you have a designated test user - but what about sign ups?
Email sign up has to be the most important aspect of any application and without access to unique, private email addresses end-to-end testing is difficult.
Luckily there's MailSlurp, a free API that lets you create real, randomized email addresses on demand. It also lets you send and receive email programmatically - perfect for end-to-end testing user sign-up flows!
An example
To demonstrate the Cypress test runner we will use the MailSlurp Authentication Playground app. It's a dummy React application that has a user sign-up process. To test this process end-to-end we'll write a test case that will:
- Load the playground in Cypress
- Create a test email address with MailSlurp
- Sign up for using the email address
- Receiving a confirmation email
- Extract the confirmation code and confirm the user
Setup Cypress
To setup make sure you have NodeJS installed then run:
npm install --save cypress mailslurp
Your package.json should look something like this:
{
  "description": "Example of using emails with Cypress JS",
  "scripts": {
    "test": "cypress run",
    "dev": "cypress open",
    "postinstall": "cypress install"
  },
  "dependencies": {
    "cypress": "^10.5.0",
    "mailslurp-client": "^15.13.3"
  }
}
Next we need to create a cypress.config.js file. We will set defaultCommandTimeout and requestTimeout to 30 seconds so that our tests have time to wait for emails to be sent or received. We'll also add some viewport dimensions to the Cypress browser.
const { defineConfig } = require('cypress')

module.exports = defineConfig({
  defaultCommandTimeout: 30000,
  requestTimeout: 30000,
  viewportHeight: 800,
  viewportWidth: 800,
  videoCompression: false,
  e2e: {
    setupNodeEvents(on, config) {},
  },
})
Setup MailSlurp
In order to use MailSlurp with Cypress we will define some custom commands.
To avoid creating custom commands check out the MailSlurp Cypress Plugin instead.
To do that create a cypress/support directory and add e2e.js and commands.js if not already present.
cypress
└── support
    └── commands.js
    └── e2e.js
Inside e2e.js import the commands file.
import './commands'
Now inside commands let's import and configure a MailSlurp client - this will let us send and receive emails. Make sure you have a free MailSlurp API Key first.
const { MailSlurp } = require('mailslurp-client');
// set your api key with an environment variable `CYPRESS_API_KEY` or configure using `env` property in config file
// (cypress prefixes environment variables with CYPRESS)
const apiKey = Cypress.env('API_KEY')
const mailslurp = new MailSlurp({ apiKey });

Cypress.Commands.add("createInbox", () => {
  return mailslurp.createInbox();
});

Cypress.Commands.add("waitForLatestEmail", (inboxId) => {
  // how long we should hold connection waiting for an email to arrive
  const timeoutMillis = 30_000;
  return mailslurp.waitForLatestEmail(inboxId, timeoutMillis)
});
Set API Key environment variable
The MailSlurp config we created requires an API KEY to be set with the CYPRESS_API_KEY environment variable.
On Linux/Mac run cypress commands like so:
CYPRESS_API_KEY=your-api-key cypress run
For Windows environments run:
$env:CYPRESS_API_KEY=your-api-key;
cypress run;
Calling custom commands
Now in Cypress tests we can do the following:
cy.mailslurp()
  .then((mailslurp) => mailslurp.createInbox())
  .then((inbox) => {
    console.log(inbox);
    // { id: '...', emailAddress: '...' }
  });
Or
cy.mailslurp()
  .then((mailslurp) => mailslurp.waitForLatestEmail(inbox.id))
  .then((email) => {
    console.log(email);
    // { subject: '...', body: '...' }
  });
You can also add your own custom commands for any functions you want to call on the MailSlurp email API.
Create test structure
So in order to test a sign-up flow end-to-end we need an integration test.
Create a test spec in the cypress/integration folder structure:
touch cypress/e2e/example.cy.js
The test should be located as follows:
cypress
└── e2e
    └── example.spec.js
Inside e2e/example.cy.js let's write our first test.
Writing a test
Let's start simple and write a test to load the MailSlurp playground app in Cypress.
That would look a little like this:
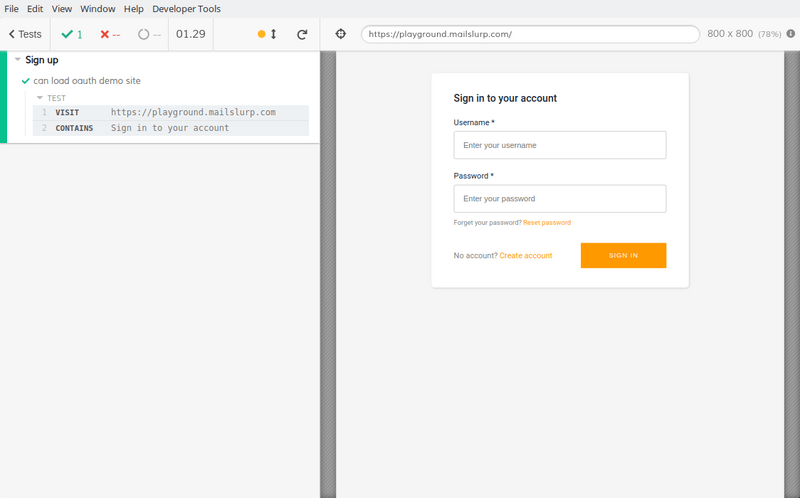
it('can load oauth demo site', () => {
  cy.visit('https://playground.mailslurp.com');
  cy.contains('Sign in to your account');
});
Next we want to click a sign up button to begin the sign up process.
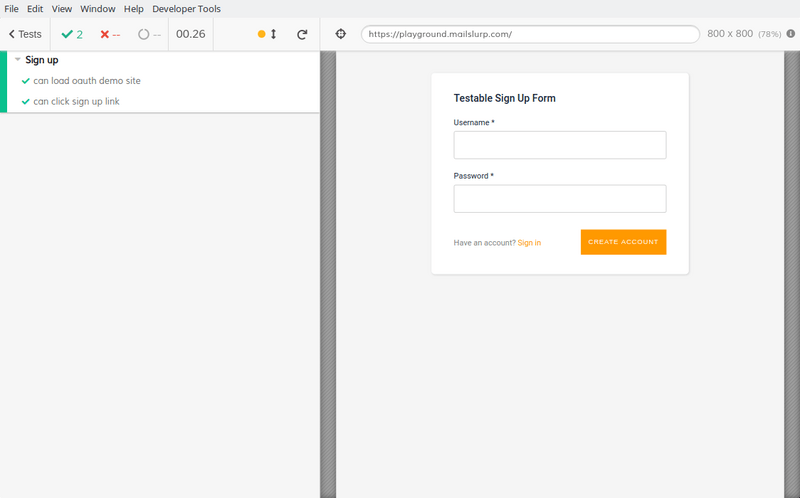
it('can click sign up link', () => {
  cy.get('[data-test="sign-in-create-account-link"]').click();
  cy.contains('Testable Sign Up Form');
});
Running tests
To run the test run CYPRESS_API_KEY=your-api-key npx cypress run.
Cypress will open:
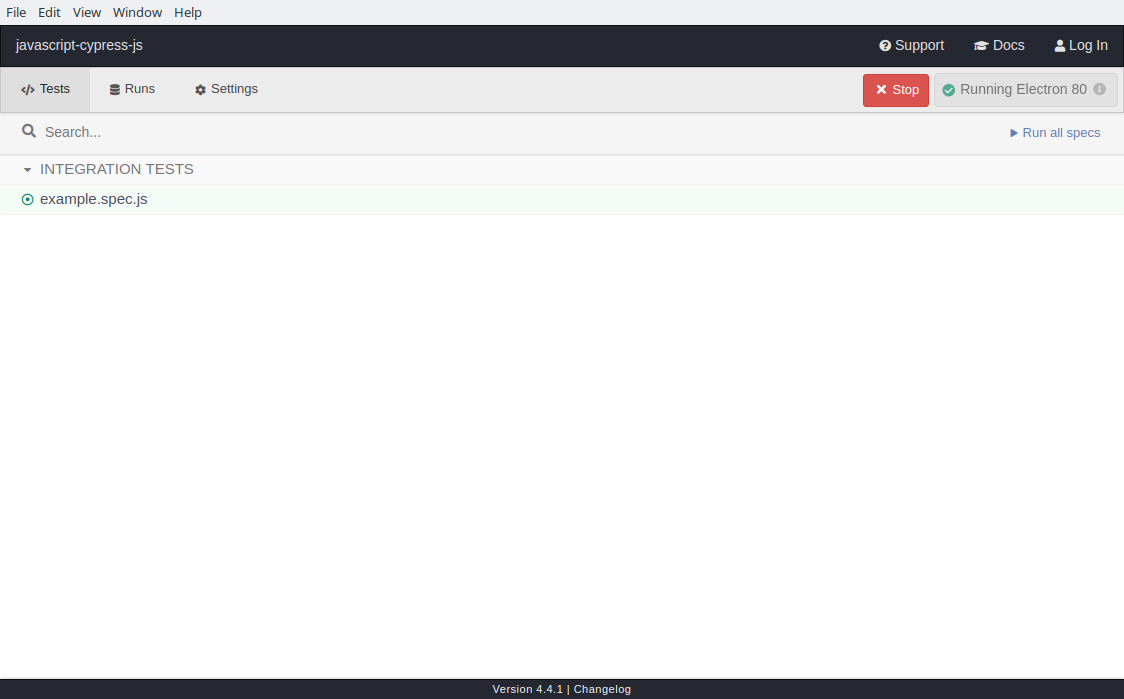
Click the spec runs our test. Our clicked Cypress loads the Playground app and asserts that a sign-in message is displayed on the page, it then clicks the sign-up link.
The test executed output looks like this:
Testing with emails in Cypress
Now let's integrate email address into our test using MailSlurp. MailSlurp requires an api key but it's free for personal use so sign up to get one.
Once you've sign up we can extend Cypress with a command to creates new email address when we need them.
Using our createInbox command
Now that we have a Cypress command that returns a new email address we can put it all together in our sign up test. Inside the same describe method add the following:
const password = "test-password";
let inboxId;
let emailAddress;
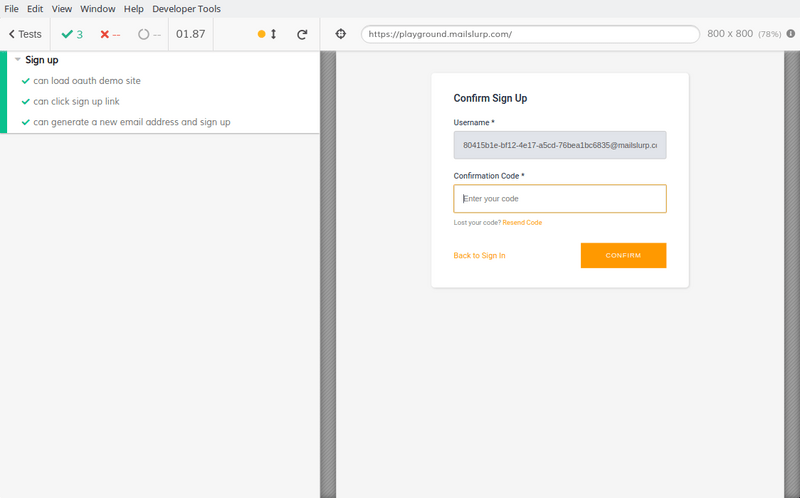
it('can generate a new email address and sign up', () => {
// see commands.js custom commands
cy.createInbox().then(inbox => {
// verify a new inbox was created
assert.isDefined(inbox)
// save the inboxId for later checking the emails
inboxId = inbox.id
emailAddress = inbox.emailAddress;
// sign up with inbox email address and the password
cy.get('input[name=email]').type(emailAddress);
cy.get('input[name=password]').type(password);
cy.get('[data-test="sign-up-create-account-button"]').click();
});
});
Now we can run our tests again
npx cypress run
Cypress loads our login screen and enters a real address that was generated with MailSlurp. We then see a confirm screen:
Receive confirmation email
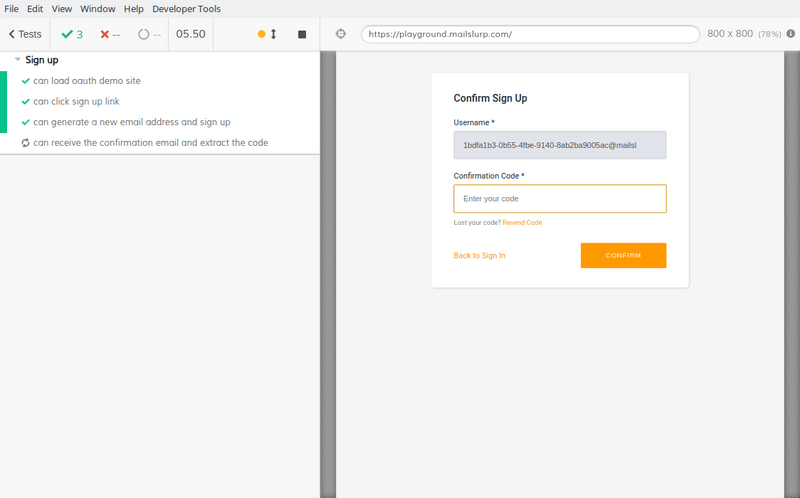
Once we have submitted our new user sign-up the Playground will send a confirmation email with a code that we need to enter. We can receive this email using MailSlurp:
let code;
it('can receive the confirmation email and extract the code', () => {
  // wait for an email in the inbox
  cy.waitForLatestEmail(inboxId).then(email => {
    // verify we received an email
    assert.isDefined(email);

    // verify that email contains the code
    assert.strictEqual(/verification code is/.test(email.body), true);

    // extract the confirmation code (so we can confirm the user)
    code = /([0-9]{6})$/.exec(email.body)[1];
  });
});
Running the tests shows that Cypress waits for and extracts the email content:
Confirm the user
Finally we can use the extracted email code to confirm the user:
it('can enter confirmation code and confirm user', () => {
  assert.isDefined(code);
  cy.get('[data-test="confirm-sign-up-confirmation-code-input"]').type(code);
  cy.get('[data-test="confirm-sign-up-confirm-button"]').click();
});
Now we can use Cypress to login with our confirmed email address and password:
it('can log in with confirmed account', () => {
  cy.contains('Sign in to your account');
  // fill out username (email) and password
  cy.get('[data-test="username-input"]').type(emailAddress);
  cy.get('[data-test="sign-in-password-input"]').type(password);
  // submit
  cy.get('[data-test="sign-in-sign-in-button"]').click();
});
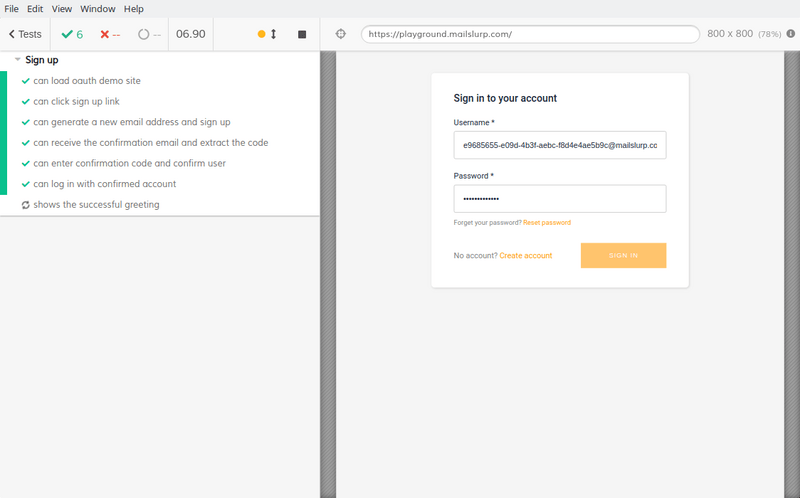
If successful the Playground will show a picture of a happy dog. Let's test for that:
it('shows the successful greeting', () => {
  cy.contains("Welcome");
});

Next Steps
Testing with real emails means truly testing your app's most important processes like user sign up and email verification. MailSlurp makes Cypress email testing easy!
For more information on receiving emails in tests see the developers sections.
Production Cypress email-testing checklist
Before turning Cypress specs into release gates, validate this full workflow.
- Create isolated test inboxes per spec in Email Sandbox.
- Run deterministic sign-up and reset assertions in Email Integration Testing.
- Capture async provider callbacks through Email Webhooks.
- Route retries and fallback behavior via Email Automation Routing.
- Add inbox placement and reputation checks using Email Deliverability Test.
Code Samples
As always you can find this and other examples in the MailSlurp examples repository. Use MailSlurp free and take your end-to-end test coverage to :100: !