blog
Nodemailer NPM Guide: Send Email with Node.js SMTP
Learn Nodemailer SMTP setup for Node.js, secure credential handling, common failure fixes, and CI-ready send-and-receive email testing workflows.
If you searched for npm nodemailer or nodemailer smtp, this guide gives you a production-safe workflow.
Quick answer
- configure Nodemailer with explicit SMTP host, port, TLS, and auth
- keep credentials in environment variables
- test full send-and-receive behavior before release
- monitor deliverability after provider or DNS changes
Node mailer vs Nodemailer
Searches for "node mailer" usually refer to Nodemailer, the popular Node.js package for sending email over SMTP and other transports.
The package name is nodemailer. In application code, teams typically pair Nodemailer with:
- environment-managed SMTP credentials
- a transactional email provider or test mail server
- receive-side tests that confirm the message actually arrived
- deliverability checks after DNS, template, or provider changes
Install Nodemailer
npm install nodemailer
If you need to confirm the currently published package version:
npm view nodemailer version
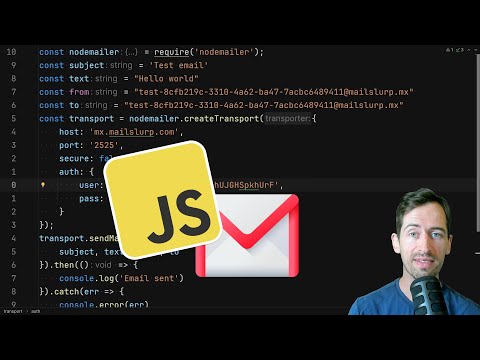
Minimal SMTP send example
const nodemailer = require("nodemailer");

const transport = nodemailer.createTransport({
  host: process.env.SMTP_HOST,
  port: Number(process.env.SMTP_PORT || 587),
  secure: false,
  auth: {
    user: process.env.SMTP_USERNAME,
    pass: process.env.SMTP_PASSWORD,
  },
});

async function sendEmail() {
  await transport.sendMail({
    from: process.env.SMTP_FROM_ADDRESS,
    to: "user@example.com",
    subject: "Welcome",
    text: "Your account is ready.",
  });
}
Before sending real traffic, verify the transporter handshake once at startup:
await transport.verify();
This catches bad host/port/auth combinations early instead of failing only on first production send.
Nodemailer plus MailSlurp receive testing
Nodemailer handles the send side of the workflow. MailSlurp completes the test by giving the message a real inbox and API assertions.
Install the packages you need for a CI smoke test:
npm install nodemailer mailslurp-client
Then send to a generated inbox and wait for the message:
const nodemailer = require("nodemailer");
const { MailSlurp } = require("mailslurp-client");

const mailslurp = new MailSlurp({
  apiKey: process.env.MAILSLURP_API_KEY,
});

const inbox = await mailslurp.createInbox();

const transport = nodemailer.createTransport({
  host: process.env.SMTP_HOST,
  port: Number(process.env.SMTP_PORT || 587),
  secure: false,
  auth: {
    user: process.env.SMTP_USERNAME,
    pass: process.env.SMTP_PASSWORD,
  },
});

await transport.sendMail({
  from: process.env.SMTP_FROM_ADDRESS,
  to: inbox.emailAddress,
  subject: "Nodemailer smoke test",
  text: "This email should arrive in a MailSlurp inbox.",
});

const received = await mailslurp.waitForLatestEmail(inbox.id, 30_000, true);

if (!received.subject.includes("Nodemailer smoke test")) {
  throw new Error("Expected Nodemailer message was not received");
}
This checks the real path: SMTP handoff, delivery, inbox receipt, and received-message content. Add link, OTP, attachment, and HTML assertions when the flow is customer-facing.
Video walkthrough
This MailSlurp tutorial shows how to send email from Node.js with Nodemailer and SMTP, then think through the testing side of the workflow.
SMTP config checklist for Node teams
Validate and document:
- host and port per environment
- TLS mode (
587STARTTLS vs465TLS) - auth settings and credential rotation
- sender-domain posture (SPF, DKIM, DMARC)
- timeout and retry policy
References:
Common Nodemailer failures and fixes
EAUTH or 535 authentication errors
Likely causes:
- invalid credentials
- auth mechanism mismatch
- sender-domain policy issues
Connection timeout or refusal
Likely causes:
- wrong host/port
- blocked outbound network access
- TLS mismatch
SMTP accepts send but no inbox delivery
Likely causes:
- spam-folder placement
- reputation/authentication issues
- recipient filtering rules
Run follow-up checks with:
Add receive-side assertions in CI
Do not stop at send success. Verify:
- message arrival in expected inbox
- subject/body/template correctness
- OTP and verification link integrity
- event timing and retries
Recommended workflow pages:
Production checklist for Nodemailer
- Keep SMTP credentials in environment variables only.
- Validate sender-domain auth posture before launch.
- Add deterministic inbox assertions for critical journeys.
- Capture bounce/failure signals for triage.
- Re-test after template, DNS, or SMTP-provider changes.
FAQ
Is Nodemailer free?
Yes, Nodemailer is open source.
Can Nodemailer receive emails?
Nodemailer is a sending library. Pair it with MailSlurp inbox APIs for receive-side testing, OTP extraction, link checks, and CI assertions.
Is Nodemailer good for production?
Yes, with robust configuration, end-to-end testing, and deliverability monitoring.