guides
Custom email domain setup with MailSlurp (step-by-step)
Configure a custom email domain with MailSlurp using TXT, MX, and DKIM records. Practical verification workflow and rollout checklist.
This guide shows a production-safe way to connect your domain to MailSlurp for sending and receiving email.
You will complete:
- domain registration (if needed),
- MailSlurp domain onboarding,
- DNS verification with TXT, MX, and DKIM records,
- inbox creation and catch-all behavior validation.
For API details, use custom domains docs.
Before you start
- Use a root domain like
example.com(nothttps://example.com). - Confirm you can edit DNS records in your registrar.
- If this domain already has email service, plan MX migration carefully.
If existing production mailboxes depend on current MX records, perform a controlled cutover window.
Step 1: Register or select a domain
Use any registrar that supports TXT, MX, and CNAME management.
Step 2: Create a MailSlurp account
Sign up at MailSlurp, then open Domains in the dashboard.
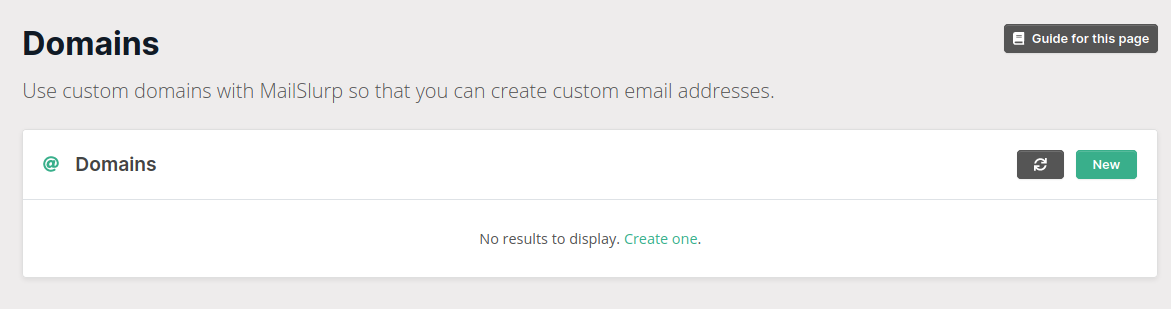
Step 3: Add your domain in MailSlurp
Click New domain, enter your domain, and submit.
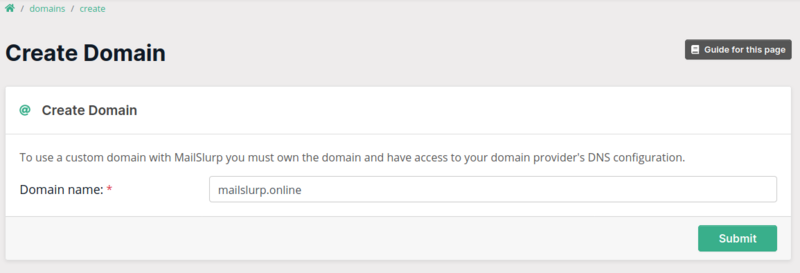
MailSlurp will generate DNS records specific to your account.
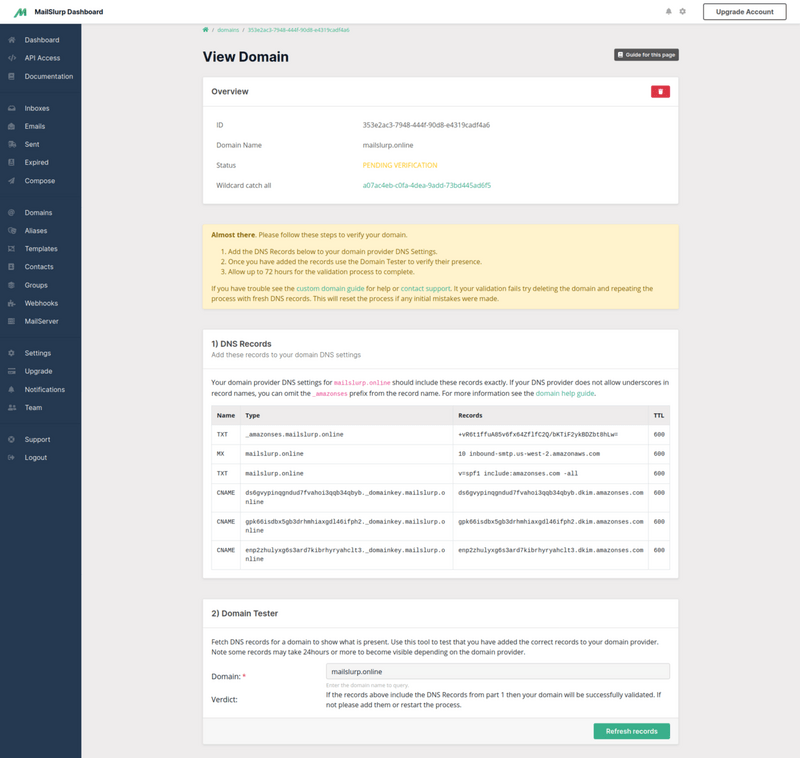
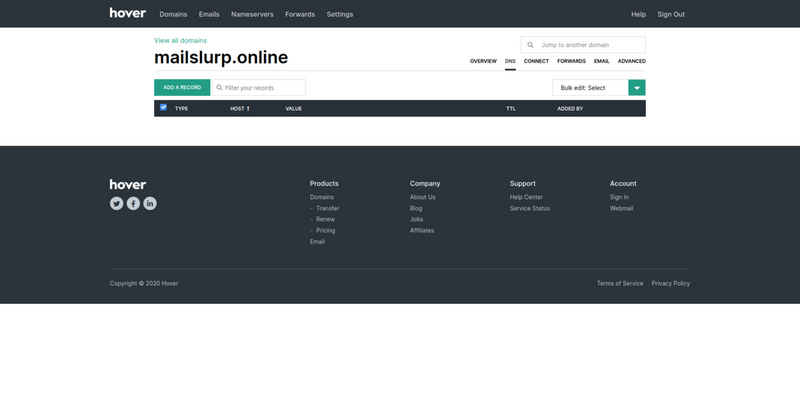
Step 4: Copy DNS records from MailSlurp
These values are unique. Copy from your dashboard, do not reuse example values.
Step 5: Add DNS records at your registrar
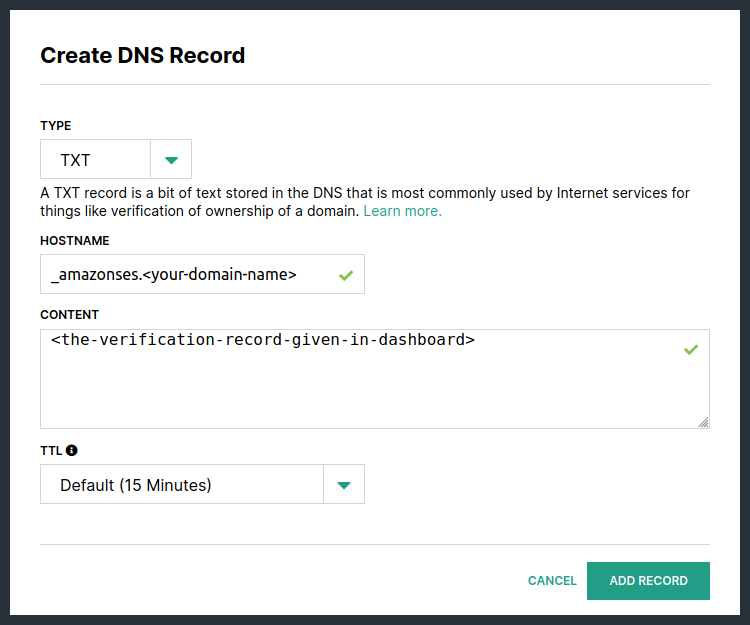
5.1 Add verification TXT record
This proves domain ownership.
5.2 Add inbound MX record
This routes inbound mail to MailSlurp.
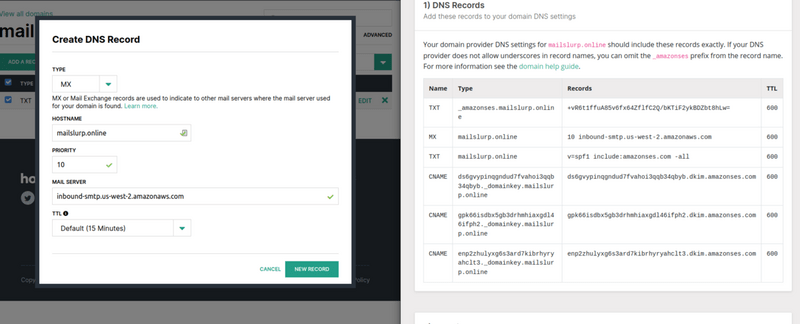
If your registrar uses separate fields:
- If you encounter two fields enter
10forPriorityandinbound-smtp.us-west-2.amazonaws.comfor the value. - If only one field is given, use:
10 inbound-smtp.us-west-2.amazonaws.com
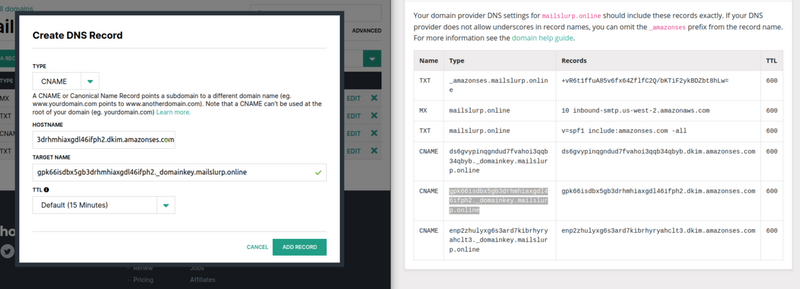
5.3 Add DKIM CNAME records
DKIM is required for sender trust and better inbox placement.
Step 6: Verify DNS and domain status
Use the domain testing widget in MailSlurp:
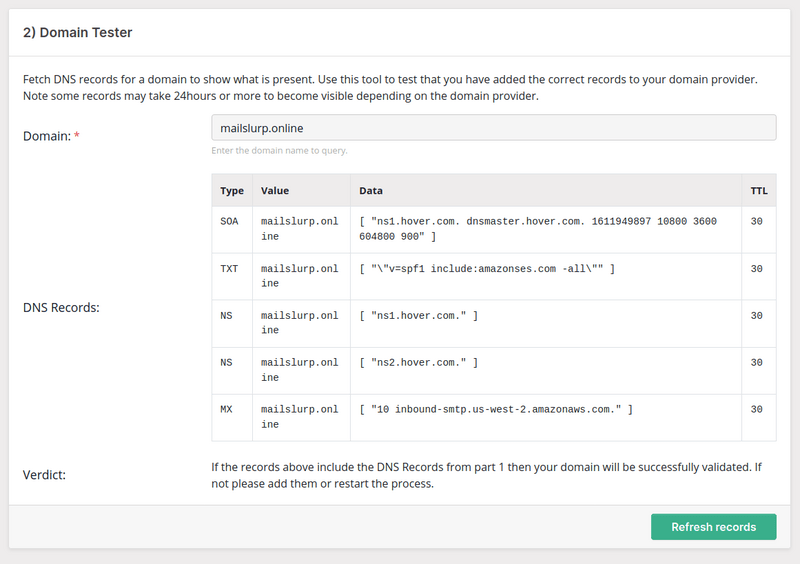
When verified, your domain card shows a verified badge.
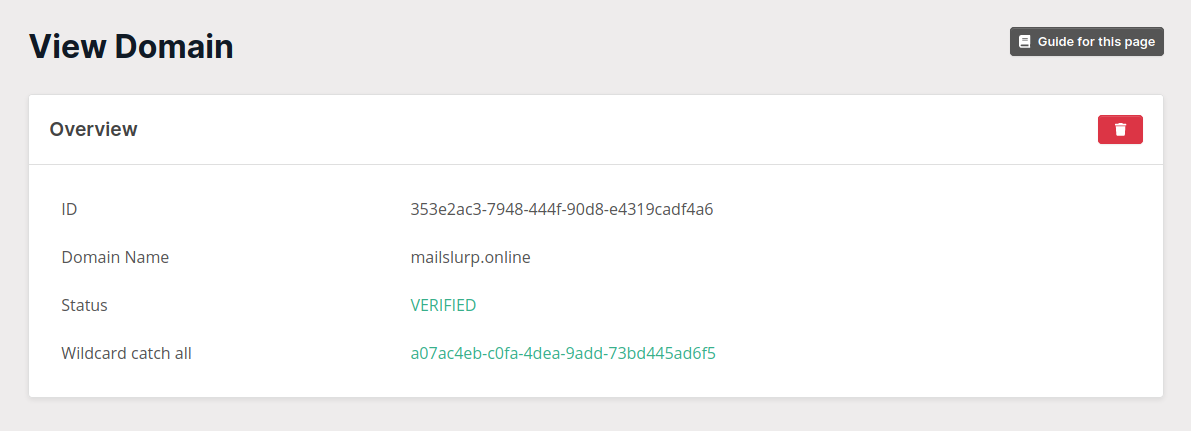
MailSlurp can also create a wildcard/catch-all inbox. See catch-all guide.
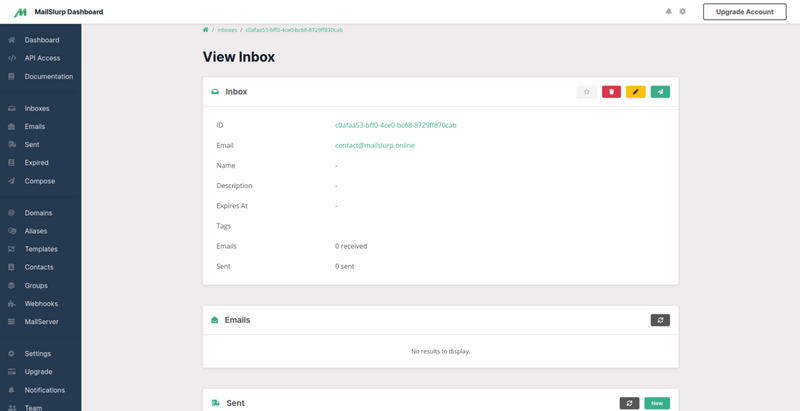
Step 7: Create custom inbox addresses
After verification, create inboxes like support@yourdomain.com or qa+build123@yourdomain.com.

View the inbox and confirm receive/send behavior:
Production rollout checklist
- Verify TXT, MX, and DKIM are all green before launch.
- Send test messages to multiple mailbox providers.
- Validate SPF/DKIM/DMARC alignment on outbound traffic.
- Set monitoring for bounce and complaint trends.
For deliverability controls, see: