
examples
How to send and read email in Laravel (PHP)
Build a Laravel email workflow that sends with SMTP and receives through the MailSlurp API or webhooks, with a complete PHP example you can run locally.
Laravel makes sending an email pleasantly familiar. Receiving one is where many examples stop. In this guide we build both sides of the workflow: send from a Laravel application over SMTP, then read the delivered message through the MailSlurp API or handle it with a webhook.
That round trip is useful for more than a demo. It lets you test a real signup, password reset, receipt, or support reply without borrowing a personal mailbox or guessing whether delivery succeeded.
See also our Mailable and Notification Laravel guide
What we will build
We will create a small Laravel web app with one action that sends an email and another that displays the received message. It is a compact example of composing, delivering, and reading email in PHP.
Getting started
First verify that PHP is installed:
php -v
PHP command not found?
If you see that php command is not found then you need to install PHP on your machine. On a Mac this can be done with Homebrew.
brew install php
Install the Composer package manager
Next install Composer, the PHP package manager. Composer publishes the current verification step on that page, so use it instead of a checksum saved in a tutorial.

Confirm that Composer is available before continuing:
composer --version
Create new Laravel app
Now we can use composer to create a new Laravel application:
composer create-project laravel/laravel php-laravel-email-examples
This command will create a new directory called php-laravel-email-examples with a directory structure like so:
% tree -L 1
.
├── README.md
├── app
├── artisan
├── bootstrap
├── composer.json
├── composer.lock
├── config
├── database
├── lang
├── package.json
├── phpunit.xml
├── public
├── resources
├── routes
├── storage
├── tests
├── vendor
└── vite.config.js
Verify the app works
We can check that our new app works correctly by running the generated unit tests with the artisan test command:
% php artisan test

   PASS  Tests\Unit\ExampleTest
  ✓ that true is true

   PASS  Tests\Feature\ExampleTest
  ✓ the application returns a successful response

  Tests:  2 passed
  Time:   0.04s
Run the development server
Run the application locally with artisan:
php artisan serve
This will start a server on localhost:8000 by default.
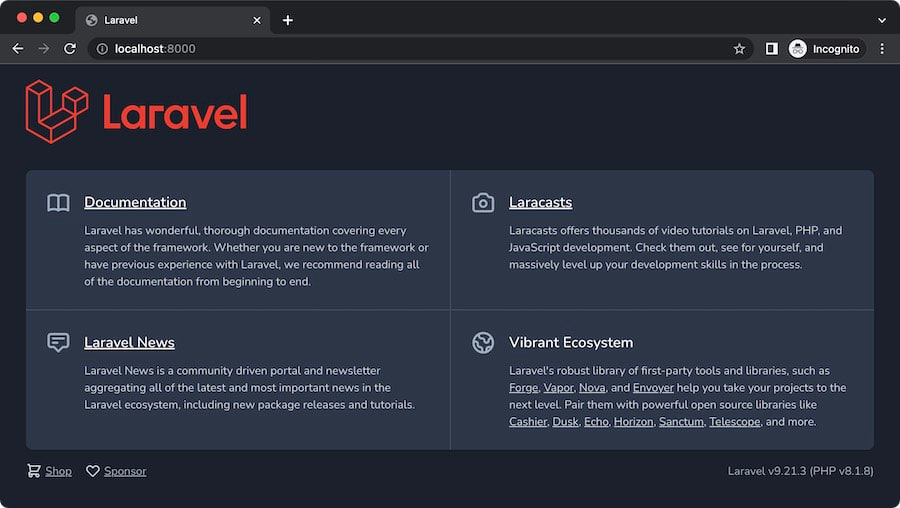
Creating a dummy view
Now modify the default view to include two buttons: one for sending and one for receiving email. Laravel views live in resources/views. Open routes/web.php to see the current route:
<?php

use Illuminate\Support\Facades\Route;

/*
|--------------------------------------------------------------------------
| Web Routes
|--------------------------------------------------------------------------
|
| Here is where you can register web routes for your application. These
| routes are loaded by the RouteServiceProvider within a group which
| contains the "web" middleware group. Now create something great!
|
*/

Route::get('/', function () {
    return view('welcome');
});
Notice the use of a welcome template view. This refers to the welcome view inside the views directory:
resources/views/welcome.blade.php
We can replace this route with our own called index:
Route::get('/', function () {
    return view('index');
});
Then create a new template in the views directory called index.blade.php.
Setting up the mail server
With the application running, configure email using .env or config/mail.php. Laravel Mailables and Notifications can then send through the configured server. We will receive the message through MailSlurp after that.
Create a mail server account
You need SMTP credentials for the next steps. Create a MailSlurp account, create an inbox, and copy its SMTP username, password, host, and port from the dashboard. Keep these values in environment variables rather than committing them to the project.
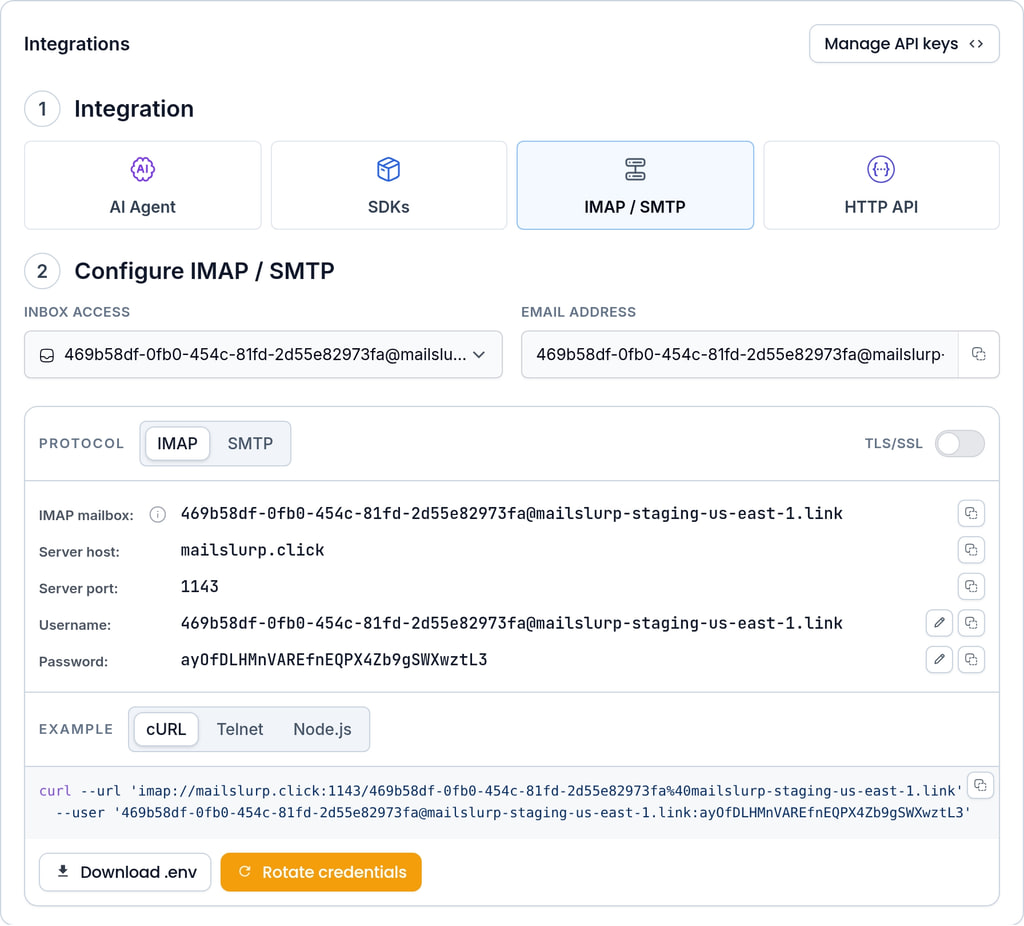
Create a .env file
If you plan to use a single mail server you can configure a .env file in your project root like this:
MAIL_MAILER=smtp
MAIL_HOST=mailslurp.mx
MAIL_PORT=2587
MAIL_USERNAME=your-smtp-username
MAIL_PASSWORD=your-smtp-password
MAIL_FROM_ADDRESS="your-inbox@mailslurp.com"
Configuring mail.php
If you want to provision inboxes dynamically use the MailSlurp PHP library instead. We can configure the mail settings in config/mail.php like this:
// configure mailslurp client
$config = MailSlurp\Configuration::getDefaultConfiguration()->setApiKey('x-api-key', $MAILSLURP_API_KEY);

// create an inbox to send emails from
$inboxController = new MailSlurp\Apis\InboxControllerApi(null, $config);
$senderInbox = $inboxController->createInboxWithOptions(new \MailSlurp\Models\CreateInboxDto(['inbox_type' => 'SMTP_INBOX', 'name' => 'Newsletters']));
$accessOptions = $inboxController->getImapSmtpAccess($senderInbox->getId());

// get access to the inbox
$host = $accessOptions->getSecureSmtpServerHost();
$port = $accessOptions->getSecureSmtpServerPort();
$username = $accessOptions->getSecureSmtpUsername();
$password = $accessOptions->getSecureSmtpPassword();

// configure laravel mailer settings to use our sender inbox
// for production apps set this in .env instead with static values
// make sure you run `API_KEY=$(API_KEY) php artisan config:cache` after setting
return [
    'default' => 'smtp',
    'mailers' => [
        'smtp' => [
            'transport' => 'smtp',
            'url' => env('MAIL_URL'),
            'host' => $host,
            'port' => $port,
            'encryption' => 'tls',
            'username' => $username,
            'password' => $password,
            'timeout' => null,
            'local_domain' => env('MAIL_EHLO_DOMAIN'),
        ],
    ],
    'from' => [
        'address' => $senderInbox->getEmailAddress(),
        'name' => $senderInbox->getName(),
    ],
    'markdown' => [
        'theme' => 'default',
        'paths' => [
            resource_path('views/vendor/mail'),
        ],
    ],
];
Now run this command to load the config changes:
php artisan config:cache
Sending email
Laravel can send through its Mailable and Notification APIs. You can also use PHPMailer when you need a lower-level SMTP example.
Sending directly with SMTP
To send directly with PHPMailer, use the SMTP credentials from your MailSlurp inbox:
// create inbox
$create = new \MailSlurp\Models\CreateInboxDto(["inbox_type"=>"SMTP_INBOX"]);
$inbox = $inboxController->createInboxWithOptions($create);
$this->assertTrue($inbox->getInboxType() == "SMTP_INBOX");
// create smtp
$server = $inboxController->getImapSmtpAccess();
$mail = new PHPMailer(true);
try {
    $mail->SMTPDebug = SMTP::DEBUG_SERVER;
    $mail->isSMTP();
    $mail->Host = $server->getSmtpServerHost();
    $mail->Port = $server->getSmtpServerPort();
    $mail->SMTPAutoTLS = false;
    $mail->SMTPAuth = false;
    $mail->setFrom("test@gmail.com", 'Test1');
    $mail->addAddress($inbox->getEmailAddress(), 'Test2');
    $mail->isHTML(true);
    $mail->Subject = 'Test subject';
    $mail->Body = 'This is test HTML body <b>in bold!</b>';
    $mail->addAttachment($this->pathToAttachment2);
    // now connect and send
    $mail->send();
    echo 'Message has been sent';
} catch (Exception $e) {
    echo "Message could not be sent. Mailer Error: {$mail->ErrorInfo}";
}
if ($mail->ErrorInfo) {
    echo $mail->ErrorInfo;
}
$this->assertTrue($mail->ErrorInfo == '');
Sending with Laravel Mailable
First create a new mail object using artisan:
php artisan make:mail Newsletter
Then define our views for the mail:
namespace App\Mail;

use Illuminate\Bus\Queueable;
use Illuminate\Mail\Mailable;
use Illuminate\Mail\Mailables\Content;
use Illuminate\Mail\Mailables\Envelope;
use Illuminate\Queue\SerializesModels;

class Newsletter extends Mailable
{
    use Queueable, SerializesModels;

    /**
     * Get the message envelope.
     */
    public function envelope(): Envelope
    {
        return new Envelope(
            subject: 'Newsletter',
        );
    }

    /**
     * Get the message content definition.
     */
    public function content(): Content
    {
        return new Content(
            view: 'emails.newsletter',
        );
    }
}
We wrote emails.newsletter for the content view, we also define a blade template resources/views/emails/newsletter:
<!DOCTYPE html>
<html lang="en">
<head>
    <title>Welcome Email</title>
    <link rel="stylesheet" href="https://cdn.jsdelivr.net/npm/@picocss/pico@1/css/pico.min.css">
</head>
<body>
<h1>Welcome to our newsletter!</h1>
<p>We are glad you have decided to join us.</p>
</body>
</html>
This template becomes the email body when sending.
Sending with Laravel notifications
Laravel also supports multi-channel notifications (meaning we could also send SMS for example). Let us define a new Notification:
php artisan make:notification NewsletterNotification
Inside the class we define our content:
namespace App\Notifications;

use Illuminate\Bus\Queueable;
use Illuminate\Notifications\Messages\MailMessage;
use Illuminate\Notifications\Notification;

class NewsletterNotification extends Notification
{
    use Queueable;

    public function __construct()
    {
    }

    public function via(object $notifiable): array
    {
        // use mail to send
        return ['mail'];
    }

    public function toMail(object $notifiable): MailMessage
    {
        return (new MailMessage)
            ->line('Welcome to our notifications!')
            ->line('We are glad you have decided to use notifications.');
    }
}
We have not specified a view because Laravel adds the notification styles. This is one practical difference between Notifications and Mailables.
Receiving email
To receive email in Laravel or PHP, use the MailSlurp SDK to fetch messages over HTTPS or configure a webhook that posts new messages to your application.
Polling for emails
// configure client with api key
$config = MailSlurp\Configuration::getDefaultConfiguration()
    ->setApiKey('x-api-key', getenv('API_KEY'));

// create an inbox controller with config
$inboxController = new MailSlurp\Apis\InboxControllerApi(null, $config);

// create inboxes
$inbox1 = $inboxController->createInbox();
$inbox2 = $inboxController->createInbox();

// send an email
$inboxController->sendEmail($inbox1->getId(), new \MailSlurp\Models\SendEmailOptions(array(
    'to' => array($inbox2->getEmailAddress()),
    'subject' => 'Test email',
    'body' => '<span>Hello 👋</span>',
    'is_html' => true
)));

// wait for email
$waitForController = new MailSlurp\Apis\WaitForControllerApi(null, $config);
$email = $waitForController->waitForLatestEmail($inbox2->getId(), 60_000, true);
PHPUnit\Framework\Assert::assertStringContainsString("Hello", $email->getBody());

// list emails in inbox
$emails = $inboxController->getInboxEmailsPaginated($inbox2->getId());
PHPUnit\Framework\Assert::assertEquals(1, $emails->getTotalElements());
Using webhooks
Webhooks let your server handle email without polling. Create a MailSlurp webhook for the inbox or account events you need, then verify and process the HTTPS request in your Laravel route or queue worker.
Laravel email rollout checklist
When moving this example from local setup to production:
- Validate SMTP and API behavior in Email Sandbox.
- Add deterministic assertions with Email Integration Testing.
- Handle inbound events with Email Webhooks.
- Route retries and parsing through Email Automation Routing.
- Use the Inbound Email API for webhook vs polling architecture decisions.
- Run pre-release checks with an Email Deliverability Test.