
examples
Cypress Email Testing with the Official MailSlurp Plugin
Install cypress-mailslurp, create an isolated inbox, wait for a matching verification email, extract its code, and clean up safely in Cypress CI.
Cypress is a powerful end-to-end browser testing framework for JavaScript and TypeScript. With the official MailSlurp Cypress plugin, you can create a private inbox for each test, wait for the expected email, and finish signup, password reset, or OTP journeys without sharing a Gmail account.
Quick links
- Cypress email testing guide
- Disposable email API for testing
- Programmable email and SMS APIs
- Example code repository
- CypressJS Plugin documentation
- CypressJS Plugin source
- Tutorial using mailslurp-client
- Example repository using mailslurp-client
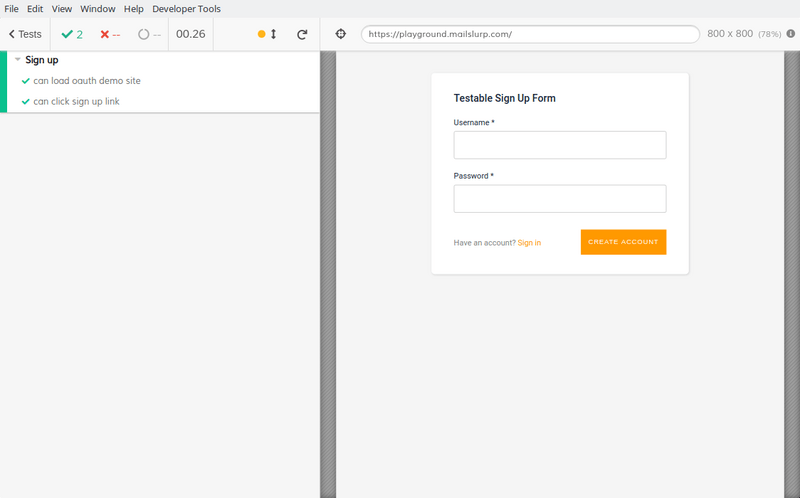
In this example we will use MailSlurp and Cypress JS to test the sign-up process of a dummy app hosted at playground.mailslurp.com.
How do I read a received email with the Cypress plugin?
Import cypress-mailslurp, call cy.mailslurp() to create an inbox, and use the returned standard MailSlurp client to wait for a subject-matched message. Give every test or parallel worker its own inbox, use a bounded timeout, and delete the inbox in afterEach so failures cannot leak state into the next run.
The canonical Cypress email testing guide contains the complete parallel-safe test. The email testing API documents the inbox and wait controls, while Email Sandbox keeps staging traffic away from customer addresses.
Example application
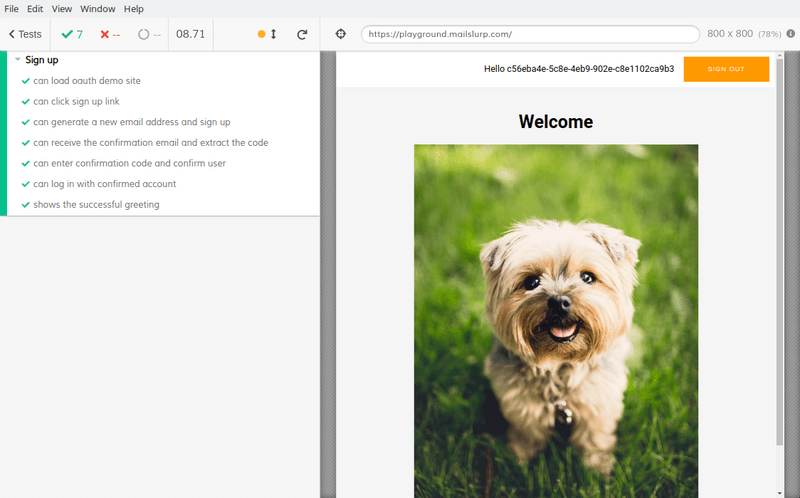
Our example app is a simple React SPA. It allows a user to sign up with an email address and password. After sign up an email verification code is sent to the user's email address. The code must be read and entered into the app to confirm the user. Once confirmed a user may login and see a picture of a happy dog.
Install Cypress and MailSlurp plugin
To use MailSlurp with Cypress first install the MailSlurp Cypress Plugin and CypressJS.
npm install --save-dev cypress cypress-mailslurp
If you wish to write tests using the standard MailSlurp client install mailslurp-client instead.
Initialize Cypress directories
To generate test directories in your project run:
cypress open
A tree of directories will be created under a cypress folder. Edit yours to look like this:
cypress
├── fixtures
├── integration
│   └── integration-test.spec.ts
├── plugins
├── screenshots
├── support
│   ├── commands.js
│   └── index.js
└── videos
Import the MailSlurp plugin
Include the MailSlurp plugin in your cypress/support/index.{js,ts} file.
import "cypress-mailslurp";
Your package.json should look something like this:
{
  "name": "javascript-cypress-mailslurp-plugin",
  "version": "1.0.0",
  "description": "Example cypress-mailslurp plugin usage",
  "scripts": {
    "test": "cypress run",
    "dev": "cypress open"
  },
  "author": "",
  "license": "MIT",
  "dependencies": {
    "cypress": "^10.5.0",
    "cypress-mailslurp": "^1.5.0",
    "typescript": "^4.4.4"
  },
  "devDependencies": {
    "debug": "^4.3.2"
  }
}
Typescript support
If you wish to use Typescript run:
npm install --save-dev typescript
tsc --init
Then use reference comments in your tests to allow for MailSlurp type hints:
/// <reference types="cypress-mailslurp" />
Or define the type yourself like so:
import { MailSlurp } from "mailslurp-client";

declare global {
  namespace Cypress {
    interface Chainable {
      mailslurp: () => Promise<MailSlurp>;
    }
  }
}
Setup API Key
The MailSlurp plugin expects a MailSlurp API Key. Create a MailSlurp account to get a free API Key.
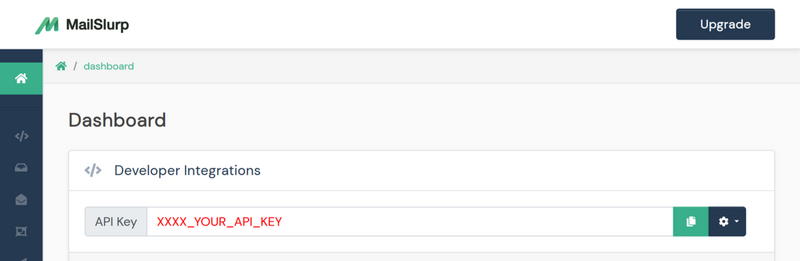
Then set the CYPRESS_MAILSLURP_API_KEY environment variable or use the cypress.config.js file env property:
import { defineConfig } from 'cypress'

export default defineConfig({
  requestTimeout: 30000,
  responseTimeout: 30000,
  defaultCommandTimeout: 30000,
  e2e: {
    // We've imported your old cypress plugins here.
    // You may want to clean this up later by importing these.
    setupNodeEvents(on, config) {
      return require('./cypress/plugins/index.js')(on, config)
    },
  },
})
Environment variable
You can configure the api key in Mac/Linux environments using the CYPRESS_MAILSLURP_API_KEY environment variable.
CYPRESS_MAILSLURP_API_KEY=your-api-key cypress run
For Windows environments:
$env:CYPRESS_MAILSLURP_API_KEY=your-api-key; cypress run;
Cypress env property
Alternatively you can setup the env using the cypress config file:
{
  "env": {
    "MAILSLURP_API_KEY": "your-mailslurp-api-key"
  }
}
Configure timeouts
For MailSlurp to send and receive emails set timeout values in cypress.json:
{
  "defaultCommandTimeout": 30000,
  "responseTimeout": 30000,
  "requestTimeout": 30000
}
Using the MailSlurp command
The MailSlurp Cypress plugin adds the mailslurp() command to the global cy object:
cy.mailslurp().then(mailslurp => /* use maislurp client methods here */)
This returns a promise that can be accessed using Cypress then commands. The MailSlurp client passed to the then methods is an instance of the standard mailslurp client. It has many methods for creating inboxes, sending emails, and receiving email content. Most methods are asynchronous.
Chaining then commands
MailSlurp methods are async so you can chain commands and access the results using Cypress then methods.
cy.mailslurp()
  .then((mailslurp) => mailslurp.createInbox())
  .then((inbox) => {
    expect(inbox.emailAddress).to.contain("@mailslurp");
  });
Aliases in a sequential walkthrough
You can store variables like inboxes and emails with Cypress wrap and as methods for a sequential walkthrough.
// use cypress-mailslurp plugin to create an email address before test
before(function () {
    cy.log("Wrap inbox before test")
    return cy.mailslurp()
        .then(mailslurp => mailslurp.createInbox())
        .then(inbox => {
            cy.log(`Inbox id ${inbox.id}`)
            // save inbox id and email address to this (make sure you use function and not arrow syntax)
            cy.wrap(inbox.id).as('inboxId')
            cy.wrap(inbox.emailAddress).as('emailAddress')
        })
});
When accessing aliased variables that have been wrapped you must use function notation (dynamic scope) not arrow syntax (lexical scope) so that this refers to a Cypress context.
- Good:
function() { this.myAlias } - Bad:
() => { this.myAlias }
Access the stored variables using this inside a function.
it("can access wrapped variable", function () {
  expect(this.emailAddress).to.contain("@mailslurp");
});
Do not share one aliased inbox across parallel specs. Production CI should create an inbox inside each test or worker and delete it in afterEach; use the parallel-safe Cypress pattern for that setup.
Full example
Let's put the Cypress MailSlurp plugin to work on a real example. The demo application at playground.mailslurp.com allows a user to sign up with an email address and password. They then receive a confirmation code by email that must be entered to confirm the account. Next the user can sign in and see a happy dog. We will next each stage next.
Setup test
Create a test file at cypress/integration/integration-test.spec.ts. (We will use Typescript but you can use Javascript if you prefer.)
/// <reference types="cypress-mailslurp" />
describe("user sign up test with mailslurp plugin", function () {
  // we will add tests here
});
Create a demo inbox for the walkthrough
This sequential tutorial creates one address for its single signup journey. Use a before block inside the describe function to follow the original example:
// use cypress-mailslurp plugin to create an email address before test
before(function () {
    cy.log("Wrap inbox before test")
    return cy.mailslurp()
        .then(mailslurp => mailslurp.createInbox())
        .then(inbox => {
            cy.log(`Inbox id ${inbox.id}`)
            // save inbox id and email address to this (make sure you use function and not arrow syntax)
            cy.wrap(inbox.id).as('inboxId')
            cy.wrap(inbox.emailAddress).as('emailAddress')
        })
});
Notice how we wrap the inbox id and emailAddress as separate aliases. We use those in the remaining stages of this one journey. For parallel suites, prefer the per-test lifecycle in the canonical guide instead of sharing these aliases.
Navigate to test application
Next we can load the playground application and assert the page title is shown.
it("01 - can load the demo application", function () {
    // get wrapped email address and assert contains a mailslurp email address
    expect(this.emailAddress).to.contain("@mailslurp");
    // visit the demo application
    cy.visit("https://playground.mailslurp.com")
    cy.title().should('contain', 'React App');
});

Sign up a user
Now we fill out the sign-up form using our created email address and a test password. Notice how we access the wrapped variables using this.
// use function instead of arrow syntax to access aliased values on this
it("02 - can sign up using email address", function () {
    // click sign up and fill out the form
    cy.get("[data-test=sign-in-create-account-link]").click()
    // use the email address and a test password
    cy.get("[name=email]").type(this.emailAddress).trigger('change');
    cy.get("[name=password]").type('test-password').trigger('change');
    // click the submit button
    cy.get("[data-test=sign-up-create-account-button]").click();
});
Cypress submits the form and the playground app will send our user a confirmation email.
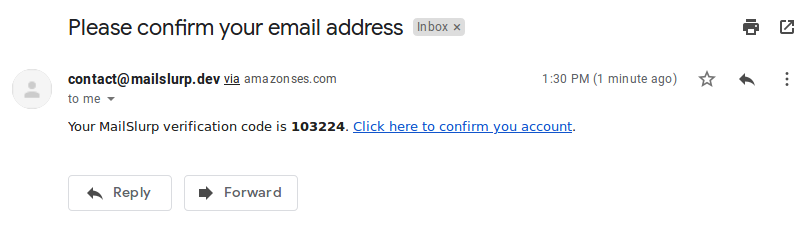
In the next step we will wait for the email to be received and then extract the code from the body.
Receive emails with Cypress
MailSlurp inboxes have real email addresses. We can use the waitFor methods to receive emails for a given inbox. In this test we wait for an email to arrive at the inbox we created and then use a regular expression to extract the confirmation code.
it("03 - can receive confirmation code by email", function () {
    // app will send user an email containing a code, use mailslurp to wait for the latest email
    cy.mailslurp()
        // use inbox id and a timeout of 30 seconds
        .then(mailslurp => mailslurp.waitForLatestEmail(this.inboxId, 30000, true))
        // extract the confirmation code from the email body
        .then(email => /.*verification code is (\d{6}).*/.exec(email.body!!)!![1])
        // fill out the confirmation form and submit
        .then(code => {
            cy.get("[name=code]").type(code).trigger('change');
            cy.get("[data-test=confirm-sign-up-confirm-button]").click();
        })
});
Lastly we submit the code to the confirmation form.
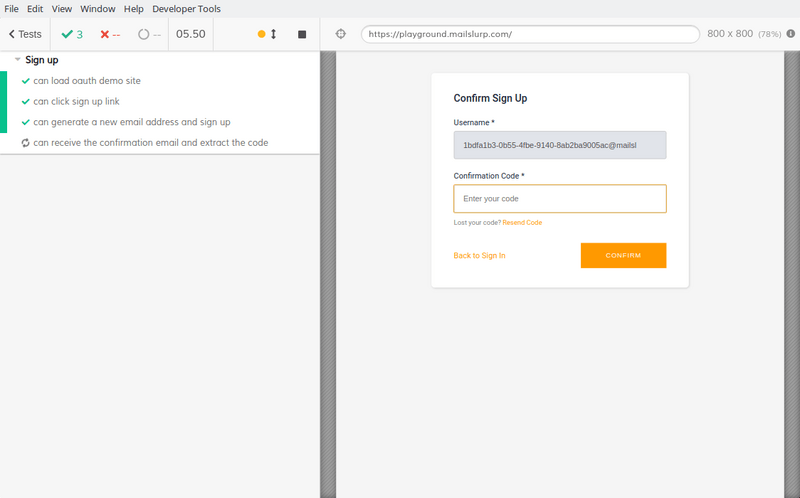
Sign in with confirmed account
Now that our user has confirmed their account we can sign in and see a welcome message.
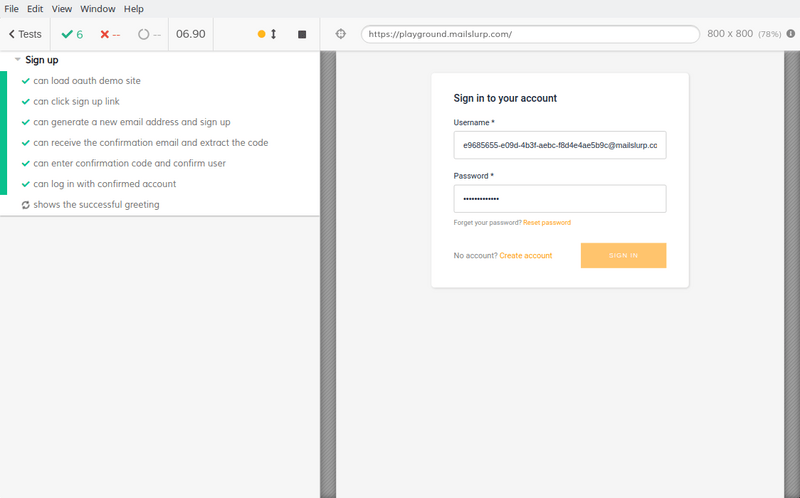
The code to sign in and test the welcome message looks like this:
// fill out sign in form
it("04 - can sign in with confirmed account", function () {
    // use the email address and a test password
    cy.get("[data-test=username-input]").type(this.emailAddress).trigger('change');
    cy.get("[data-test=sign-in-password-input]").type('test-password').trigger('change');
    // click the submit button
    cy.get("[data-test=sign-in-sign-in-button]").click();
});
Then we can see authorized welcome screen:
// can see authorized welcome screen
it("05 - can see welcome screen", function () {
    // click sign up and fill out the form
    cy.get("h1").should("contain", "Welcome");
});
If successful we should see a welcoming dog.
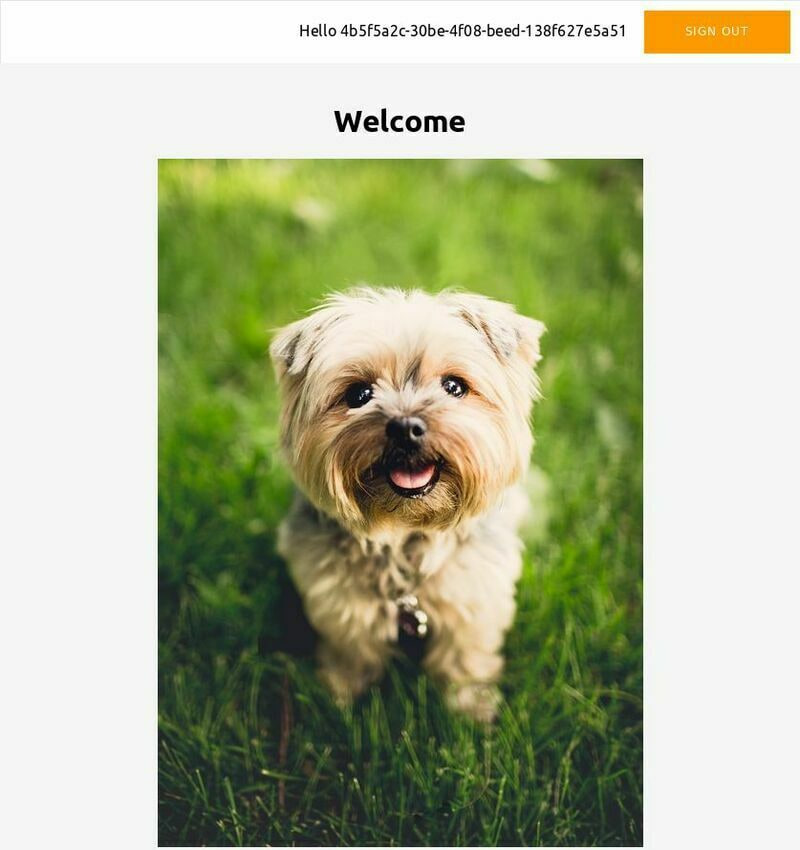
Building your own commands
If you want to create your own Cypress commands that use MailSlurp then install the default MailSlurp client:
npm install --save mailslurp-client
Then add your own commands to cypress/support/commands.js:
const { MailSlurp } = require("mailslurp-client");

const apiKey = "YOUR_MAILSLURP_API_KEY";
const mailslurp = new MailSlurp({ apiKey });
For instance, create commands for inbox provisioning, subject-matched waiting, and cleanup:
Cypress.Commands.add("createInbox", () => {
  return mailslurp.createInbox();
});

Cypress.Commands.add("waitForVerificationEmail", (inboxId) => {
  return mailslurp.waitController.waitForMatchingFirstEmail({
    inboxId,
    timeout: 60_000,
    unreadOnly: true,
    matchOptions: {
      matches: [{ field: "SUBJECT", should: "CONTAIN", value: "Verify" }],
    },
  });
});

Cypress.Commands.add("deleteInbox", (inboxId) => {
  return mailslurp.inboxController.deleteInbox(inboxId);
});
Now in Cypress tests we can do the following:
cy.createInbox().then((inbox) => {
  console.log(inbox);
  // { id: '...', emailAddress: '...' }
});
Or
cy.waitForVerificationEmail(inbox.id).then((email) => {
  console.log(email);
  // { subject: '...', body: '...' }
});
Call cy.deleteInbox(inbox.id) from afterEach so the cleanup still runs when a content or browser assertion fails.
Conclusion and next steps
Cypress is a great way to test applications end to end. Use the official MailSlurp plugin to create one inbox per test, match the email caused by the current action, and remove the inbox after the assertion. For a concise production pattern, return to the Cypress email testing guide.
As always, example code is available on GitHub.