guides
Introduction to MailSlurp
Install and configure MailSlurp using SDK libraries or REST API. Create phone numbers and email accounts and control them in code and tests.
MailSlurp is an Email API built for developers and QA testers. It lets you create real email addresses on demand then send and receive emails from code, tests, or an online dashboard.
Key concepts
MailSlurp uses a custom SMTP MailServer and AWS SES to send and receive emails at scale. You can use CRUD style API methods with MailSlurp libaries or the REST API to send and receive emails and attachments in code and test. You can also use webhooks to receive emails, new contacts and attachments directly to your server. With aliases you can configure auto-forwarding rules and more.
This is a starter guide for developers. It uses Javascript examples to illustrate key features. You can call MailSlurp's API from any programming language. For REST API and SDKs in Ruby, Java, PHP, Python, Go, C#, Swift and more see the developer documentation. You can also explore MailSlurp using the GraphQL email API
To use MailSlurp without code try our interactive dashboard or see the dashboard guide.
Setup
MailSlurp is free for personal use but you must have an API Key to use MailSlurp. Get an API Key free by creating an account.
Install a client
MailSlurp has an official Javascript client with Typescript types. (For REST API and SDKs in other languages see the documentation page.)
npm install --save mailslurp-client
Import package
In a NodeJS environment import the MailSlurp client library like so:
const MailSlurp = require("mailslurp-client").default;
Or with Javascript ES6 style imports (Typescript also supported):
import { MailSlurp } from "mailslurp-client";
The MailSlurp package uses fetch for API calls and you can override the implementation for client-side or server-side usage.
Configure credentials
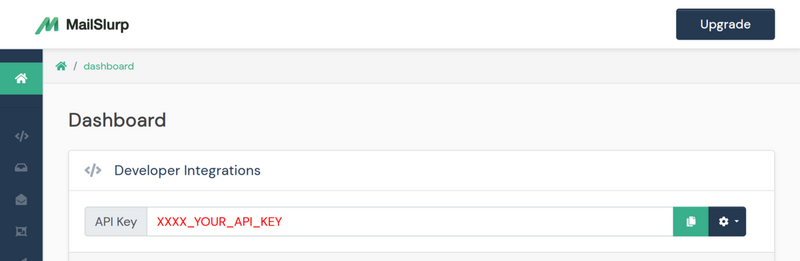
To configure MailSlurp you must supply an instance with your API Key. The API key can be found in the MailSlurp dashboard.
const mailslurp = new MailSlurp({ apiKey: your_key_here });
You now have a MailSlurp instance ready to use. Let's see how it works.
Jump ahead
Keep reading for a guided tour of MailSlurp or see the sections below to get started quickly:
- Creating inboxes
- Wait for matching emails
- Sending emails
- Receiving email
- Using Attachments
- Inbox routing rules
- Auto-forwarding rules
- Email Webhooks
- Alias auto-forwarding
- Custom Domains
- Organization team access
- DNS and IP Lookup
- SDK Documentation
- Cypress E2E testing
Choose your next build path
After setup, most teams pick one of these implementation tracks:
- CI and release testing: Email Sandbox API, Email client testing, and Campaign testing.
- Inbound automation and data extraction: Email parser API, Parser integrations, and Email automation routing.
- Deliverability and sender trust: DMARC monitoring, DMARC checker, and Email deliverability test.
Class overview
The MailSlurp instance has a number of top level convenience async functions for creating inboxes, sending emails, and receiving emails with waitFor methods. (See JS Docs for full method list)
For instance:
const inbox = await mailslurp.createInbox();
expect(inbox.emailAddress).toContain("@");
Or with promises:
mailslurp.createInbox().then((inbox) => {
  // inbox = { id: '123', emailAddress: '123@mailslurp.com' }
});
There are many other convenience methods. The full MailSlurp API functionality is also accessible through controller properties. For example:
await mailslurp.inboxController.deleteInbox(inbox.id);
Early in MailSlurp's lifecycle methods were added directly to the MailSlurp instance. For more recent features use the controllers directly to access the full API methods.
Creating an email address
The most common task in MailSlurp is to create a test email account (called an Inbox). Use the inbox controller to do so:
const { id, emailAddress } = await mailslurp.createInbox();
List emails in an inbox:
const emails = await mailslurp.getEmails(id);
See the inbox guide more information on inbox creation.
What is an inbox?
An inbox is a MailSlurp email address that can send and receive emails and attachments. Most methods require an inbox ID. We will cover more inbox creation methods in the next steps.

An inbox can be either an SMTP or HTTP inboxes. HTTP is the default and best for most cases. SMTP uses a customer SMTP mailserver targeting legacy clients and is receive-only.
Quick note on emails
Before we move on to emails sending and receiving its good to know that emails belong to inboxes. You send emails from an inbox ID and the sender address is the inbox email address. When an outside email is sent to one of your inboxes addresses it will be received by MailSlurp parsed and stored.
Emails are unread when first received and marked as read whenever returned by an API call as a full entity or viewed in the dashboard. You can filter returned emails using the unreadOnly flag to ensure you only fetch new emails.
MailSlurp provides many methods for sending and receiving emails. It can be accessed by the email ID or retrieved from an inbox as JSON, HTML, or RAW SMTP request body. A core feature of MailSlurp is waiting for emails. This is built into libraries and API endpoints with the WaitForControllerApi. Because emails are asynchronous and their arrival is unpredictable MailSlurp provides many wait methods that hold an API call open until an expected number of emails matching a query is returned. See the wait for email methods for more information.
Next up: creating inboxes
Let's explore more ways to create and use inboxes in the next page. To skip to more advanced usage see example projects or reference documentation.