
guides
Review and Approve Email Campaigns with Your Team
Build an email preview approval workflow: comment on client screenshots, compare a corrected campaign, resolve feedback and share the final version.
Use with your tools
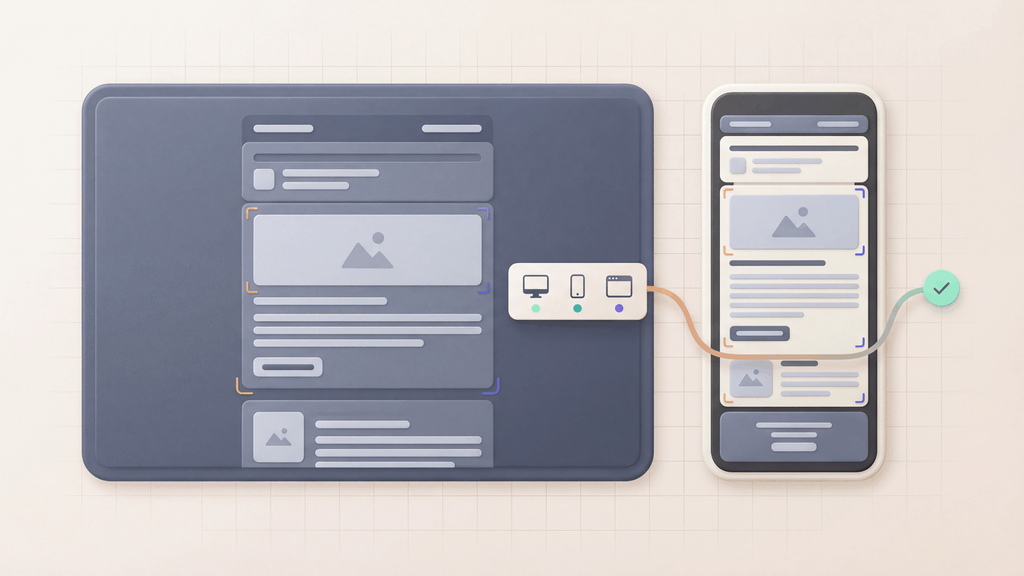
A campaign review gets confusing when the designer is looking at yesterday's test and the approver has today's screenshot. An email preview approval workflow keeps everyone working from the same delivered version, with feedback attached to the problem it describes.
In MailSlurp, send a campaign test to a render address, review the client screenshots and add comments where something needs changing. After the fix, send a fresh test, compare the two runs and share the corrected result for human sign-off. The campaign stays in the email service provider (ESP) your team already uses.
This walkthrough follows a small workshop email through that process. We sent two versions of a sample email from MailSlurp's email composer and checked Gmail web and Gmail Android. The example shows how to review a change; your campaign's target list should reflect your own readers.
Choose the clients and send the first test
Open Device previews, start a new render and expand the target selector. Choose the mail apps and devices that matter for this campaign, including relevant Outlook versions, mobile apps and available dark-mode targets. A Gmail web result and a Gmail Android result are separate checks.
Copy the displayed render address and save it with your campaign's test recipients. Sending another email to that address reuses its selected target set. For this example, we kept the same two-target address for both versions so we could compare like with like.
Send the test from the campaign's original editor. The HubSpot walkthrough and Mailchimp walkthrough show where that step happens in their respective editors. Use representative personalization data and follow your ESP's test-send rules; an ordinary test may not populate every contact-specific field.
Back in MailSlurp, choose I have sent my email, then View results when the new run appears. Check the subject and version before reviewing it. Giving test versions recognizable names helps keep a last-minute resend from being mistaken for the approved message.
Open the result that needs attention
Wait for the required targets to finish, then open their screenshots at a readable size. READY means that a screenshot is available. Your reviewers still need to decide whether the design is suitable to send.
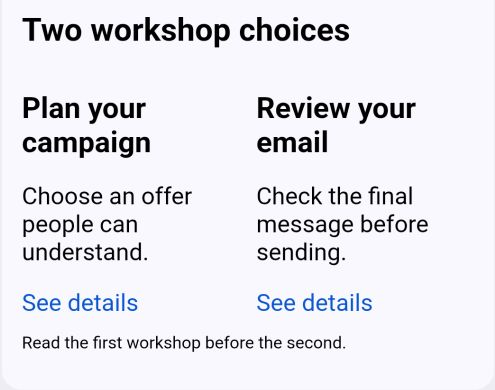
Our first workshop email completed on both selected clients. Gmail Android kept its two workshop sections side by side, which squeezed the headings into narrow columns. We wanted readers to finish "Plan your campaign" before reaching "Review your email", so the mobile design needed to stack those sections.
Start with a specific question when inspecting the result: is the offer readable, is the main action visible, and does the content follow the intended order? For a longer campaign, continue through the footer rather than stopping at the first screen.
Put the feedback beside the screenshot
In the screenshot viewer, choose Comment. MailSlurp shows which client the note applies to. A comment on the whole run is useful for a general copy change; a target-specific comment helps the designer find a problem that appears in one mail app.
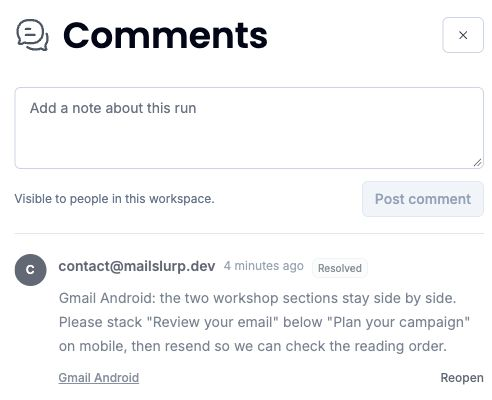
We posted this note on the Gmail Android result:
Gmail Android: the two workshop sections stay side by side. Please stack "Review your email" below "Plan your campaign" on mobile, then resend so we can check the reading order.
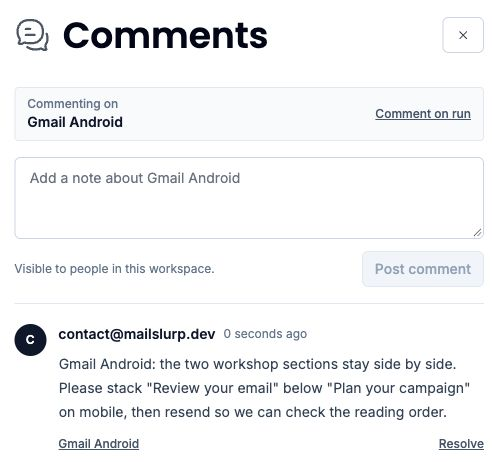
The native comment stays attached to the client result. Comments here are visible to people in the workspace.
Good email proofing feedback names the client, the visible issue and the desired outcome. "The button is below the image in Gmail Android; please keep it with the offer" gives the person making the correction more to work with than "mobile looks wrong". Agree who will make the change and who will check it; small teams can combine those roles.
Fix the original campaign and send another test
Make the correction in the source template or ESP, where it will affect the actual send. In our controlled example, we changed the workshop layout so the sections could wrap onto separate rows on mobile. The wording and links stayed the same.
Then we sent version two to the same render address. It created a new run, and both selected targets completed again. The original result remained available for comparison.
If your team uses a visual email builder, make the corresponding mobile stacking or layout change there. If a designer maintains the HTML, give them the affected screenshot and feedback. The mobile email layout guide covers that repair in more detail.
Send a fresh test after the final copy, image or tracking change too. Reviewers should approve the version that will reach readers, including changes made after the first design review.
Compare the corrected version with the first run
On a result page, choose Compare, select the other version and confirm the comparison. MailSlurp places matching targets beside each other. Open a target pair to inspect the two screenshots more closely.
Read the subjects and version labels before drawing a conclusion: Current render means the run you opened, which may be the older one. In our comparison, version one was on the left and version two on the right.
Version 1: side-by-side sections
Version 2: stacked sections
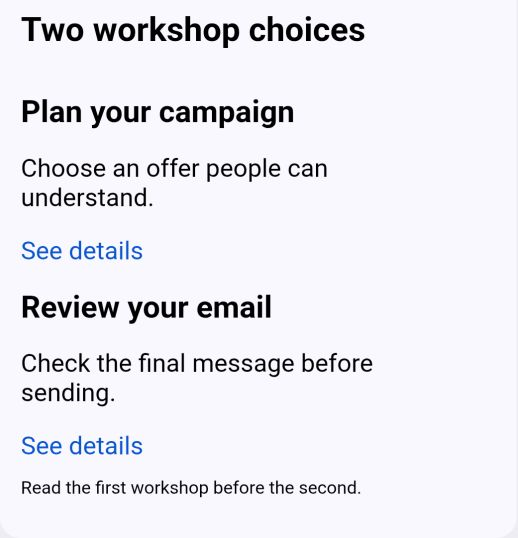
The second Android result now places "Review your email" beneath the first workshop. We also checked Gmail web to make sure the mobile correction preserved the intended desktop arrangement. These two results establish what happened in the selected clients; add the other clients your campaign needs before its final review.
The comparison documentation also explains how to compare different clients within one run. For a revision check, keep the client and mode the same on both sides so you can judge the effect of the campaign change.
Resolve the issue and share the current result
Once the correction is verified, return to the original comment and choose Resolve. The note remains visible with a resolved label and a Reopen action if the problem returns. In our example, we resolved the Android feedback after checking version two against version one.
Open the corrected run and choose Share, then Open link to check what a reviewer will see. Our shared version-two page displayed its subject, two targets, two images and 100% completion. Give reviewers the current link, rather than forwarding the earlier result again.
Anyone with that link can view the device-preview result. Use an appropriate test message and share it with the intended reviewers. Keep workspace feedback and the final launch decision clear: resolving a comment records the issue's resolution; the campaign owner decides whether to send.
A useful approval message can be as short as: "Version two reviewed in Gmail web and Gmail Android. Mobile reading order corrected. Approved for the workshop test." For a real launch, name the actual required clients and any accepted exceptions. Record that decision where your team already approves campaigns, pointing to the reviewed result.
Bring render updates into Slack or Microsoft Teams
From the share dialog, Set up Slack or Teams opens Render notifications. Connect the destination your reviewers use, then create a rule for the render events they need. The documented events cover runs starting, completing, failing or partially completing; completion messages can include a shared-result link.
Slack setup asks you to connect a workspace, review permissions and choose a channel. Teams setup opens a prefilled connect message; sending it and returning to MailSlurp completes the destination setup. Your organization's app permissions may require an administrator's help.
Follow the Slack and Teams setup guide, then use its test action to confirm delivery to the chosen destination. A "complete" notification means the rendering run has finished. Your approver should still open the result and review the campaign.
When the review gets stuck
A required screenshot is still pending or failed. Check the target's status before signing off. A completed web screenshot does not stand in for the missing mobile result. Recheck that target and review its result when available.
People are discussing different versions. Open the shared result and compare its subject and received time with the latest test. Resend the current link with a clear version name. After another campaign change, repeat the check before relying on the earlier approval.
The email looks right, but a link or image is wrong. Use Email Audit alongside the visual review for broken-link, image and content checks. Open important destinations from the test email as well. To find out whether the campaign reaches inbox or spam, run inbox placement testing as a separate check.
Questions about campaign approval
Can an agency share previews with a client?
Yes. Share the current run so the client can inspect the same rendered message. The share link is viewable by anyone who has it; workspace comments keep the team's detailed feedback with the relevant result. Agree how the client will communicate final approval.
Does resolving every comment approve the campaign?
The campaign owner makes the approval decision. Resolved comments show which issues have been addressed; check the final content, required clients and other launch checks before recording sign-off.
Can we use this process for product emails?
Yes. Trigger the welcome, receipt or password-reset email from a controlled test environment, then review the resulting message. Product teams can combine previews with email integration testing to check the workflow and links as well as appearance.